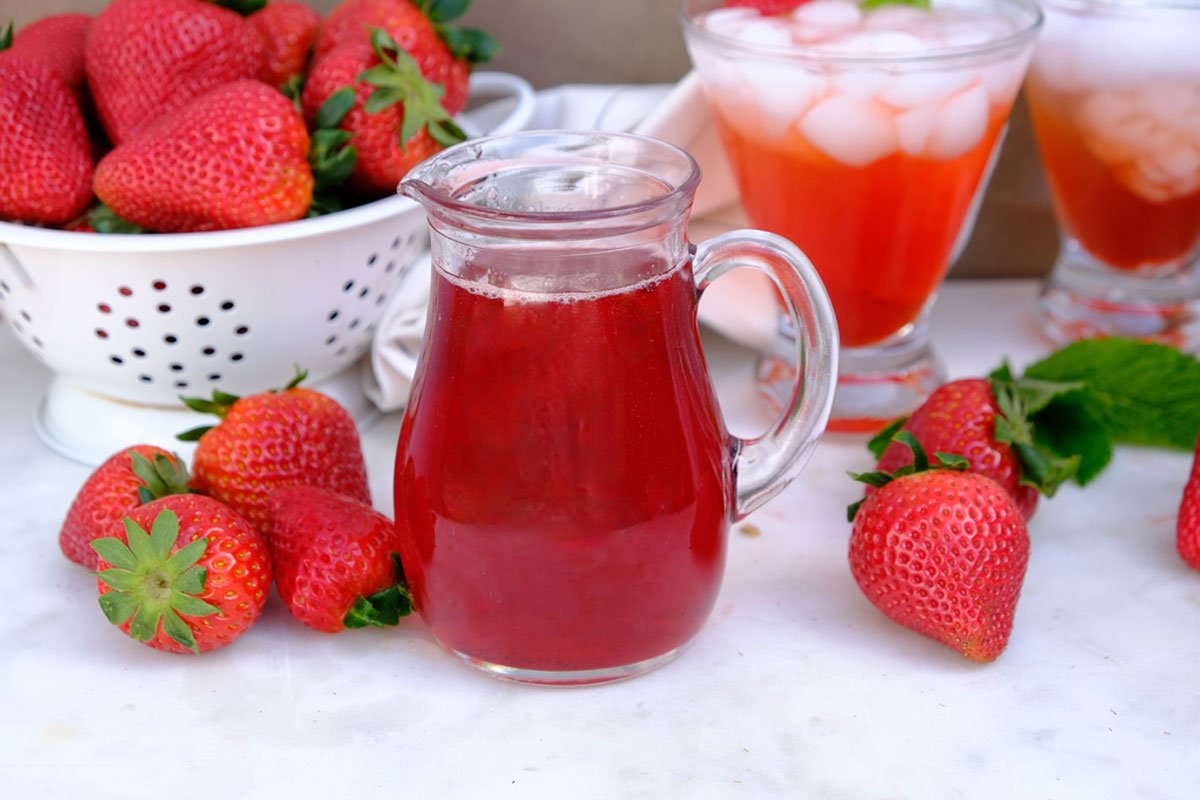
There’s a fundamental difference between a store-bought strawberry syrup—loaded with preservatives and high-fructose corn syrup—and one you make yourself. The homemade version tastes like actual strawberries, not artificial flavoring, and it takes roughly 20 minutes from start to finish. That’s faster than a trip to the grocery store.
This method for how to make a simple strawberry syrup works with fresh or frozen berries, uses a classic 1:1 sugar-to-water ratio as a starting point, and produces roughly 1.5 cups of concentrated syrup. It’s the base for cocktails, lemonades, pancakes, and cakes. And it’s flexible enough to accommodate sugar alternatives, herb infusions, or a low-sugar keto version.
The catch? Most online recipes skip the practical details that actually matter—how to fix a syrup that crystallizes, how long it keeps in the fridge (2-3 weeks, assuming you store it correctly), and what to do when it turns out too watery. This guide covers all three methods, the common failures, and the storage rules that keep your homemade fruit syrup from spoiling before you finish the bottle.
What You’ll Need: Ingredients & Tools
Making a great strawberry simple syrup starts with the right ingredients, but the ratios shift depending on whether you want a classic bar syrup, a low-sugar version, or a thick dessert drizzle. Here’s what actually works.
The Core Ingredients
You need four things: fresh strawberries, a sweetener, water, and lemon juice. The lemon juice isn’t optional — it preserves color and prevents crystallization. Without it, your homemade fruit syrup turns brown within 48 hours.
The standard ratio for a classic strawberry sweetener is 1:1:2 — one cup sugar, one cup water, two cups chopped strawberries. That yields roughly 1.5 cups of finished syrup. For a richer, more concentrated strawberry simple syrup, bump the berries to 3 cups and reduce water to ¾ cup.
Sugar alternatives change the math. Honey and agave are sweeter than white sugar, so use ¾ cup per 1 cup of water. Monk fruit sweetener measures 1:1 with sugar but needs a pinch of cream of tartar to prevent graininess. Agave produces a thinner syrup , expect it to run off pancakes faster than sugar-based versions.
Frozen strawberries work fine , in fact, they often produce better color because they’re flash-frozen at peak ripeness. Thaw them first and reserve the juice. That juice replaces some of the water in the recipe.
Tools of the Trade
You don’t need much, but cheap tools ruin the process.
| Tool | Why It Matters | What to Avoid |
|---|---|---|
| Saucepan | Medium-bottomed, 2-quart minimum. Thin pans scorch sugar before strawberries release liquid. | Non-stick with scratched coating , metal ions can discolor syrup. |
| Fine-mesh strainer | Catches seeds and pulp. Standard colander lets seeds through. | Cheesecloth (absorbs too much syrup) or paper towels (disintegrate). |
| Glass storage jar | Mason jar or swing-top bottle. Glass doesn’t retain odors or react with acid. | Plastic containers , lemon juice leaches plastic compounds over 2+ weeks. |
| Wooden spoon | Doesn’t conduct heat or scratch pans. | Metal whisk (introduces air bubbles that cause crystallization). |
One thing most guides skip: a kitchen scale. Measuring strawberries by volume is wildly inconsistent. A “cup” of chopped berries can vary by 40% depending on how fine you chop them. 200 grams of strawberries = precisely 200 grams. Use a scale if you want repeatable results.
“The difference between a store-bought strawberry syrup and one you simmer yourself is night and day. Fresh berries give you real color and real flavor, not the artificial red that stains your tongue.”
, r/cocktails community, ongoing discussion
That sentiment echoes across r/cocktails, a community of serious home bartenders where threads about fruit cheong for cocktails (a Korean preservation technique) confirm homemade syrup is worth the effort. One practical tip from a May 2026 r/mildlyinfuriating thread: don’t make simple syrup while shirtless. Hot sugar syrup splashes at 230°F and sticks to skin. Treat it with the same caution you’d give hot oil.
That kind of precision matters. The difference between a thin, watery syrup and a glossy, pour-friendly one is often just 50 grams of berries or 2 minutes of simmer time. Get the tools right first.
Step-by-Step: How to Make Strawberry Simple Syrup
This recipe delivers roughly 1.5 cups of syrup from one pound of strawberries. Total time: about 25 minutes, most of which is hands-off simmering. The classic ratio for a standard simple syrup is 1:1 sugar to water, but strawberries add their own natural sweetness and pectin, which changes the math slightly. Here’s how to get it right on the first try.
Prep the Strawberries
Start with one pound of fresh strawberries. Rinse them under cool running water to remove dirt and any pesticide residue. According to the USDA (2024), strawberries rank among the “Dirty Dozen” produce items with the highest pesticide loads, so a thorough wash matters.
Hull each berry , that’s the green leafy cap and the white core underneath. Use a paring knife or a strawberry huller. Then roughly chop the berries into quarters or smaller pieces. Uniform size ensures even extraction during simmering.
Can you use frozen strawberries? Yes. Frozen berries work perfectly and often produce a deeper color because they’re flash-frozen at peak ripeness. Use them straight from the bag , no thawing needed. Add 2-3 extra minutes to the simmer time to account for the frozen berries releasing their water more slowly.
Simmer the Mixture
Combine the chopped strawberries, 1 cup of granulated sugar, and 1 cup of water in a medium saucepan. Add 1 tablespoon of fresh lemon juice , this preserves the bright red color and prevents the sugar from recrystallizing later. The acidity also balances the sweetness.
Bring the mixture to a boil over medium-high heat. Stir occasionally to dissolve the sugar completely. Once boiling, reduce the heat to low and let it simmer uncovered for 10 minutes. You’ll see the liquid turn a deep ruby red, and the strawberry pieces will soften and begin to break apart.
Don’t boil it longer than 12-15 minutes unless you want a thicker, jam-like consistency. Over-reducing concentrates the sugar too much, which increases the risk of crystallization when the syrup cools. A common mistake is walking away from the pot , set a timer.
Strain & Cool
Place a fine-mesh strainer over a large bowl or a heatproof liquid measuring cup. Pour the hot strawberry mixture through the strainer. Use the back of a spoon to press firmly on the solids, extracting every last drop of syrup. You should get about 1.5 cups of liquid.
Discard the spent strawberry pulp , or save it for another use like stirring into yogurt or spreading on toast. Let the syrup cool completely at room temperature, about 30 minutes. Do not refrigerate it while still warm; condensation will dilute the syrup and shorten its shelf life.
Once cool, transfer the syrup to a clean glass jar or bottle with a tight-fitting lid. Store it in the refrigerator for up to 3 weeks, or freeze it in ice cube trays for up to 6 months. If you see mold, an off-smell, or cloudiness before that window, discard it immediately , those are signs of spoilage.
| Step | Key Detail | Common Mistake |
|---|---|---|
| Prep | Wash and hull 1 lb fresh strawberries; chop into quarters | Skipping the hull , white cores add bitterness |
| Simmer | 10 minutes at low boil with 1:1 sugar-water ratio + lemon juice | Boiling too long (causes crystallization later) |
| Strain | Press solids firmly through fine-mesh strainer | Not pressing enough , leaves 25% of syrup in the pulp |
| Cool | Room temperature for 30 minutes before refrigerating | Sealing warm syrup , condensation creates mold risk |
Sugar Alternatives & Flavor Variations
Classic strawberry simple syrup relies on white sugar, but that doesn’t work for everyone. Whether you’re cutting carbs, managing blood sugar, or just bored with plain syrup, both the sweetener and the flavor profile are easy to swap. The key is understanding how each alternative behaves under heat and how long it keeps.
Low-Sugar & Keto-Friendly Syrups
Replacing white sugar with honey, agave, or monk fruit changes more than just the calorie count. It affects shelf life, texture, and sweetness intensity. Here’s how the ratios shake out for a standard batch using 1 cup of water and 2 cups of chopped strawberries:
| Sweetener | Amount Needed | Fridge Life | Best Use |
|---|---|---|---|
| Honey | ¾ cup | 3–4 weeks | Tea, yogurt, cocktails |
| Agave nectar | ½ cup | 2–3 weeks | Margaritas, cold drinks |
| Monk fruit (granular) | ⅓ cup | 2–3 weeks | Keto baking, coffee |
| Stevia (liquid) | 1 tsp extract | 1–2 weeks | Lowest-calorie option |
A common mistake with honey and agave: they’re sweeter than white sugar, so using a 1:1 swap produces
How to Store Homemade Strawberry Syrup (And How Long It Lasts)
Homemade strawberry syrup keeps for 2–3 weeks in the refrigerator and up to 6 months in the freezer. The shelf life depends entirely on three factors: container choice, storage temperature, and whether you added lemon juice as a preservative. Most homemade fruit syrup recipes fail not from poor cooking, but from poor storage.
Refrigerator Storage
Pour cooled syrup into a clean glass jar with an airtight lid , Mason jars work perfectly. Plastic containers are fine short-term, but glass doesn’t absorb odors or react with the acidity in your strawberry simple syrup. The fridge keeps your syrup safe for 2–3 weeks.
Watch for these spoilage signs: visible mold (fuzzy patches on the surface or floating inside), a sour or yeasty smell, or any cloudiness that wasn’t there when you bottled it. If you see any of these, toss the batch. Don’t scrape off mold and keep the rest , the mycelium runs deeper than what’s visible.
One thing most guides skip: the lemon juice in your recipe isn’t just for flavor. The acid acts as a natural preservative. According to the USDA (2024), acidified syrups with a pH below 4.6 inhibit bacterial growth significantly longer than non-acidified versions. If you skipped the lemon, your syrup’s fridge life drops to roughly 10–14 days.
Freezer Storage
Freeze your fresh strawberry syrup in ice cube trays for up to 6 months. Each standard cube holds roughly 1 ounce , perfect for portioning into cocktails, lemonade, or pancake drizzles without thawing the whole batch.
Once frozen solid, pop the cubes out and transfer them to a freezer-safe zip-top bag or airtight container. Label the bag with the date. The 6-month mark is a quality guideline, not a safety cutoff , frozen syrup stays safe indefinitely, but the strawberry flavor starts fading noticeably after 6 months.
A practical reality: frozen syrup cubes thaw in about 15 minutes at room temperature, or 30 seconds in the microwave on low power. Don’t refreeze thawed syrup. Each freeze-thaw cycle degrades the texture and concentrates any bacterial activity that survived the initial freezing.
| Storage Method | Shelf Life | Container | Best For |
|---|---|---|---|
| Refrigerator (with lemon juice) | 2–3 weeks | Glass Mason jar, airtight | Daily use in drinks, desserts |
| Refrigerator (no lemon juice) | 10–14 days | Glass Mason jar, airtight | Quick use within 2 weeks |
| Freezer (ice cube trays) | Up to 6 months | Freezer bag or rigid container | Portioned cocktails, lemonade |
| Freezer (bulk container) | Up to 6 months | Wide-mouth freezer jar, ½-inch headspace | Baking, large-batch cooking |
Troubleshooting: Why Your Syrup Crystallized or Is Too Thin
You followed the recipe, but something went wrong. The syrup looks like a snow globe or runs like water. Both failures are fixable, and both stem from predictable mistakes that most recipes never explain.
Crystallization , Caused by Undissolved Sugar or Agitation
Crystallization happens when sugar molecules recrystallize into solid clumps instead of staying dissolved in water. The two main culprits: undissolved sugar crystals left on the sides of the pan during boiling, or stirring the syrup aggressively after it starts cooling. According to the University of Nebraska-Lincoln Extension (2023), introducing air or agitation to a supersaturated sugar solution triggers nucleation , the same physics that turns maple sap into maple candy.
The fix is straightforward: Reheat the crystallized syrup gently over low heat with a splash of water (roughly 1 tablespoon per cup of syrup) and a squeeze of fresh lemon juice. The acid from the lemon inverts some of the sugar, breaking the crystalline structure. Swirl the pan , do not stir , until the crystals dissolve. Strain through a fine-mesh strainer before storing.
Prevention trick competitors ignore: Wipe down the inside rim of your saucepan with a wet pastry brush before you start boiling. This removes stray sugar granules that act as crystallization seeds. One brush stroke prevents a whole jar of ruined syrup.
Thin/Watery Syrup , Usually from Too Much Water or Not Enough Simmer Time
Thin syrup is almost always a ratio problem. The standard simple syrup ratio is 1:1 sugar to water by volume. But when you add strawberries, you introduce additional water from the fruit itself. Fresh strawberries are roughly 91% water by weight, according to USDA FoodData Central (2024). That extra moisture dilutes your sugar concentration.
The fix depends on how thin it is: If your syrup is slightly watery, return it to the stove and simmer uncovered for another 5–8 minutes. You want to evaporate excess water until the liquid coats the back of a spoon. If it’s very thin , more like strawberry juice than syrup , you have two options. Option one: simmer longer (up to 15 minutes), watching carefully so it doesn’t caramelize. Option two: whisk in a cornstarch slurry (1 teaspoon cornstarch mixed with 2 teaspoons cold water per cup of syrup) and simmer for 2 minutes until thickened. This works well for pancake syrup but not for cocktails, where the starch can leave a cloudy appearance.
What many home cooks don’t realize: You can also fix thin syrup by adding more sugar. Dissolve ¼ cup of sugar into the warm syrup off the heat, then return to a brief simmer. This preserves the fresh strawberry flavor better than extended boiling, which cooks the fruit taste out.
Frequently Asked Questions
How do you make simple strawberry syrup?
Combine equal parts sugar and water (1:1 ratio) with roughly chopped strawberries in a saucepan. Bring to a boil, then simmer for 10 minutes. Strain through a fine-mesh sieve, pressing the solids to extract every drop. Cool completely before bottling. That’s the entire process , three ingredients, one pot, about 15 minutes of active time.
Can I use frozen strawberries for strawberry syrup?
Yes, and in some ways frozen berries work better. They’re picked at peak ripeness and flash-frozen, so they often deliver more consistent flavor than out-of-season fresh strawberries. No need to thaw them first , toss them straight into the pot. The only adjustment: frozen berries release more water during cooking, so simmer an extra 2–3 minutes to compensate.
How long does homemade strawberry syrup last?
In a sealed glass jar in the refrigerator, homemade strawberry syrup stays good for 2–3 weeks. Freezer storage extends that to 6 months , pour the syrup into ice cube trays, freeze solid, then transfer the cubes to a freezer bag. Thaw individual cubes as needed. Look for mold, cloudiness, or an off-smell as spoilage signs; if it smells like fermented fruit or looks fuzzy, toss it immediately.
What is the ratio of sugar to water for simple syrup?
Classic simple syrup uses a 1:1 ratio of sugar to water by volume. For strawberry syrup, that ratio stays the same , 1 cup sugar to 1 cup water , with roughly 2 cups of chopped berries added. A 2:1 ratio (rich simple syrup) produces a thicker, sweeter result that lasts longer in the fridge, but it can mask the strawberry flavor. Stick with 1:1 for fruit-forward syrups.
How do you thicken strawberry syrup?
Thin syrup usually means too much water or not enough simmer time. Fix it by returning the strained syrup to the saucepan and simmering uncovered for another 5–8 minutes until it reduces. If you’re in a hurry, mix 1 teaspoon cornstarch with 2 teaspoons cold water, whisk the slurry into the simmering syrup, and cook 1 minute until glossy. This works, but it slightly clouds the syrup , fine for pancakes, less ideal for cocktails.
Yield and nutrition: What do you get per batch?
One batch using 2 cups berries, 1 cup sugar, and 1 cup water yields roughly 1.5 cups of finished syrup. Each 2-tablespoon serving contains approximately 60 calories and 14 grams of sugar , all from added sugar, since the strawberry solids are strained out. For comparison, commercial strawberry syrups often pack 90–100 calories per serving with high-fructose corn syrup as the first ingredient.
| Batch Size | Berries | Sugar | Water | Yield |
|---|---|---|---|---|
| Small | 1 cup | ½ cup | ½ cup | ~¾ cup |
| Standard | 2 cups | 1 cup | 1 cup | ~1½ cups |
| Large | 4 cups | 2 cups | 2 cups | ~3 cups |
Can I use honey or
Conclusion
Making your own strawberry syrup at home takes about 20 minutes from start to finish. That’s less time than a trip to the store, and you get a product that tastes like actual fruit , not sugar water with artificial coloring. Whether you pour it over pancakes, stir it into lemonade, or shake it into a cocktail, this homemade fruit syrup delivers flavor that bottled versions simply can’t match.
The real advantage of making it yourself is control. You decide the sweetness level. You pick the flavor additions , vanilla bean, fresh mint, a strip of lemon zest. You know exactly what’s in it. And if you’re watching sugar intake, the strawberry simple syrup made with monk fruit or honey works just as well as the classic version.
Where This Syrup Shines
This fresh strawberry syrup isn’t a one-trick ingredient. It works across three categories:
| Use Case | Best Application | Pro Tip |
|---|---|---|
| Drinks | Cocktails, iced tea, lemonade, coffee | Use 1–2 tablespoons per 8 oz drink; adjust to taste |
| Desserts | Ice cream, yogurt, pound cake, cheesecake | Drizzle warm over vanilla ice cream for a sundae |
| Breakfast | Pancakes, waffles, French toast, oatmeal | Replace maple syrup 1:1 for a fruity swap |
What to Try Next
Now that you know how to make a simple strawberry syrup, experiment with the variations. Add basil and black pepper for a savory-sweet twist. Use half raspberries for a berry blend. Infuse with rosemary for a cocktail syrup that will surprise your guests. The base recipe is forgiving , change one ingredient at a time and see what lands.
Store your syrup in a sealed jar in the fridge (2–3 weeks) or freeze it in ice cube trays for up to 6 months. One batch, a dozen uses. That’s the whole point of a good strawberry sweetener.