

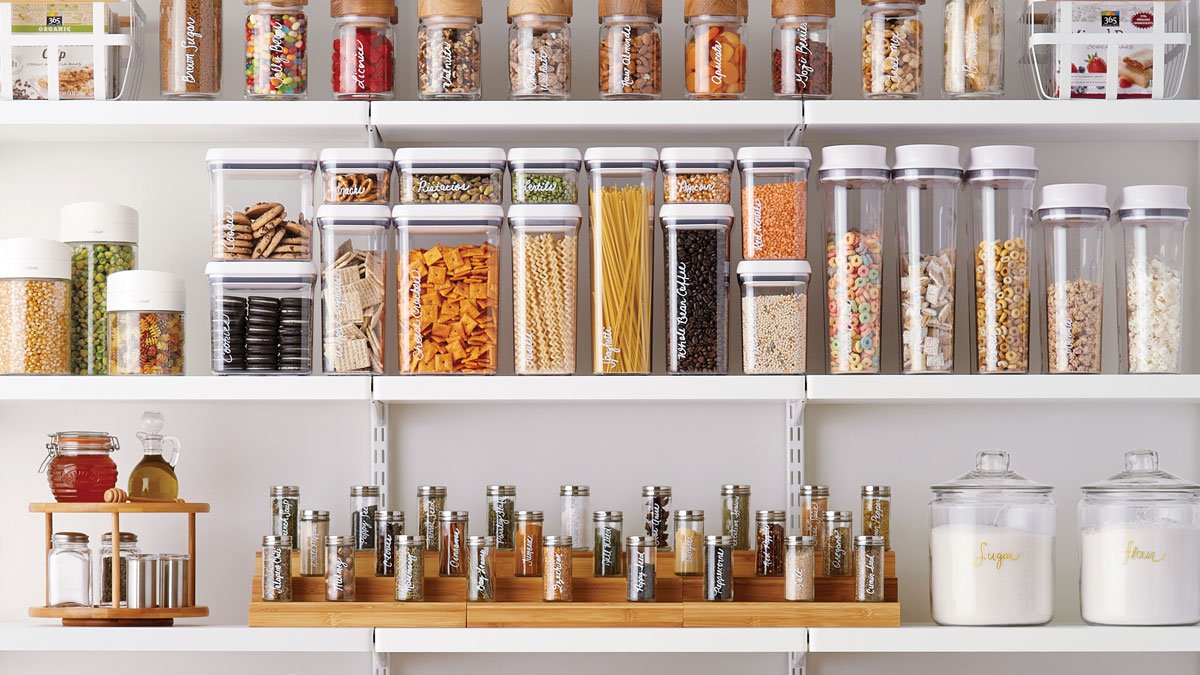
A disorganized pantry costs more than time. The USDA estimates American households waste 30 to 40% of their food supply, and a chaotic pantry is a major contributor. Items get buried behind newer purchases, expire, and get rebought. The fix is not a dozen matching containers. It is a repeatable system built around how your family actually eats.
The process that works starts with a complete empty-out, a ruthless discard of expired goods, and a deep clean. From there, you build zones based on routine, apply FIFO (first in, first out) to stop wasting food, and choose storage that fits both your budget and your shelf dimensions. Whether you have a walk-in pantry or a single cabinet, the steps are identical.
This guide walks through the full process: decluttering, zoning, storage selection, labeling, and the seasonal reset that keeps a pantry from sliding back into chaos. The goal is a system that survives a Tuesday night with hungry kids, not just a Sunday photoshoot.
Step 1: Empty, Declutter, and Deep Clean Your Pantry
Start by removing every item from the pantry, sorting it on a flat surface, discarding expired or damaged goods, then wiping shelves with warm soapy water before anything goes back. This is the only honest starting point. You cannot arrange clutter into order, and skipping the empty-out guarantees the new system collapses within a month.
Pull everything out and sort into categories
Clear every shelf. Every can, box, bag, and forgotten jar. Spread items across your kitchen counters or dining table. Sort by type: canned vegetables, grains, pasta, baking supplies, snacks, sauces, and spices. This is where you face what you actually own and what you do not need.
Check expiration dates as you go. According to the USDA (2023), most shelf-stable foods remain safe past their “best by” date, but quality degrades over time. Toss anything visibly damaged, rusted, or bulging. Donate unopened, non-expired items your household will not eat. The thread of relief that runs through posts on r/OrganizationPorn — a community devoted to before-and-after transformations — is unmistakable once the full empty-out is finally donThe pattern in the comments under that post is consistent. Nobody mentions a fancy container set. They mention what they threw out.
Clean shelves and check for pests
With the pantry empty, inspect every corner. Look for spilled sugar, flour dust, or crumbs that attract pantry moths and weevils. Wipe all surfaces with warm soapy water, then dry completely. For stubborn residue, use a 50/50 vinegar-water spray. It kills mold spores without harsh chemicals.
This is also the moment to install shelf liners. They catch future spills and make weekly wipe-downs faster. Skip the expensive adhesive liners. A roll of non-slip drawer liner from the dollar store costs under $3 and works just as well. If you spot pest evidence, webbing, tiny beetles, or larvae, discard all open dry goods in that area and vacuum the shelves before washing. One infested bag of flour can ruin an entire pantry.
Step 2: Create a Functional Zone System
Group pantry items by how you actually cook and eat, not by supermarket category. A standard pantry works best with five zones: grab-and-go snacks at eye level, breakfast items together, cooking staples within arm’s reach, backstock on the highest or lowest shelves, and a kid-friendly bottom zone. According to the National Resources Defense Council (2023), the average American household wastes $1,300 in food annually, and poor organization is a major driver of that loss.
Assign zones by usage
Think about your mornings. You grab coffee, oatmeal, a granola bar for the kid. That is a breakfast zone. Dinner prep? Oils, spices, canned tomatoes, pasta. That is a cooking staples zone. The logic follows your routine, not the grocery aisle.
Here is a practical breakdown for a standard pantry:
| Zone | What goes here | Best shelf height |
|---|---|---|
| Grab-and-go | Snack bars, fruit pouches, single-serve nuts | Eye level (easiest reach) |
| Breakfast | Cereal, oatmeal, coffee, pancake mix | Upper shelf or eye level |
| Cooking staples | Oils, vinegars, spices, canned tomatoes, pasta | Mid to lower shelf |
| Backstock | Bulk rice, extra canned goods, paper towels | Highest or lowest shelf |
| Kid-friendly | Healthy snacks they can reach themselves | Bottom shelf (child-height) |
The kid-friendly zone is the one most guides forget. If you want a pantry that stays organized for longer than a month, put snacks your children can reach on the lowest shelf. It stops them from pulling cereal boxes down on themselves while hunting for a fruit pouch. A dedicated snack shelf at toddler height removes the daily avalanche and gives kids real independence.
Use the FIFO method to reduce food waste
FIFO stands for first in, first out. It is the same rotation system grocery stores use. Newer items go behind older ones. When you reach for a can of beans, you grab the one closest to expiry. Simple on paper, harder in practice, especially with deep shelves where things vanish into a black hole.
Clear food storage containers solve this. Pour your rice, flour, and cereal into transparent bins. Label the front with the purchase date or best-by date. Stack them so the oldest is always in front. Shelf risers help here: they create a small step, letting you see the second row without unloading the first.
A common mistake is buying opaque containers because they look prettier on Instagram. Resist the urge. You need to see what is inside or the system fails the moment you stop personally restocking it.
Step 3: Choose Storage Solutions (Budget vs. Splurge)

Spend money on items you touch daily, like airtight containers for flour and sugar, and use cheap or free options for everything else. A mix of dollar-store hacks and one or two strategic splurges outperforms a $200 acrylic set every time. The right choice matches the solution to the problem, not the price tag.
Budget-friendly options (under $20)
Start with what you already own. Repurposed glass pasta sauce jars work perfectly for dry goods like rice and lentils. Dollar-store lazy Susans cost about $3 each and instantly solve the problem of reaching items shoved against the back wall. Command hooks with small wire baskets create hanging storage inside cabinet doors for spice packets or foil rolls.
For shelf risers, stackable soda cans from bulk packs serve as makeshift tiered stands until you upgrade. Shoeboxes covered in wrapping paper or contact paper make perfectly serviceable free bins. These solutions cost under $20 total and outperform many plastic organizers sold at big-box retailers.
Splurge-worthy upgrades (for long-term durability)
Invest in items you touch daily. Clear acrylic bins let you see every can at a glance, which supports the FIFO method and reduces food waste. OXO Good Grips food storage containers seal airtight and stack cleanly, worth the $15 to $25 per container if you buy grains in bulk.
Tiered shelf risers from brands like mDesign or Simplehuman transform deep shelves into accessible rows. Here is a quick comparison of where real value lives:
| Product Type | Budget Option | Splurge Option | When to Splurge |
|---|---|---|---|
| Dry storage containers | Repurposed jars ($0) | OXO Good Grips ($18 to $25) | Weekly-used staples like flour or sugar |
| Shelf risers | Cardboard boxes cut to size ($0) | mDesign tiered risers ($12 to $20) | Deep cabinets where cans stack two-deep |
| Lazy Susans | Dollar-store plastic ($3) | Simplehuman metal ($30) | Corner cabinets or heavy oil bottles |
DIY solutions for deep or awkward shelves
Standard pantry dimensions are a myth. For shelves deeper than 16 inches, install tension rods vertically to create narrow dividers, then slide baking sheets and cutting boards in upright instead of stacking them into a mess. For cabinets with no pull-out drawers, attach a $5 wire basket to the inside of the door using adhesive strips.
If your pantry has no door at all, mount a tension rod across the opening and hang a curtain. It hides the contents during the moments you have not had time to reset, and it costs under $10 to install.
Step 4: Label Everything and Maintain the System
A consistent labeling system is what turns a one-time reorganization into a self-sustaining one, because it removes the guesswork for everyone who uses the kitchen. Without labels, family members guess where things go within two weeks, and the “baking shelf” becomes a graveyard for half-used bags of chickpea flour.
Best labeling practices (chalk, vinyl, or printable)
The label type matters less than consistency. Pick one system and commit.
| Label Type | Best For | Durability | Cost |
|---|---|---|---|
| Chalk labels (writable stickers) | Glass jars, frequently rotated items | Moderate, smudges over time | Low (about $5 for 50) |
| Vinyl / waterproof labels | Plastic bins, shelf risers, high-moisture areas | High, survives wiping | Medium (about $10 for 100) |
| Printable / clear labels | Uniform look, bulk containers | High if laminated | Low to medium |
| Label maker (Dymo/Brother) | Everything, fastest to replace | Very high | Higher upfront (about $25 to $40) |
The single best technique no one writes about is to label the shelf edge, not the container. A shelf-edge label like “Canned Tomatoes” stays put when you swap out the actual can. That makes FIFO simpler, because you rotate stock without relabeling anything. For clear containers, a small chalk label on the lid is enough. For opaque bins, use a vinyl label on the front face.
How to keep it organized: weekly 5-minute resets
Maintenance is where most organized pantries die. The fix is a weekly 5-minute reset, not a deep clean, just a quick correction. The “I am in over my head” posts on r/organizing almost always trace back to the same root cause: skipping the reset for two months and then trying to fix everything at once.
“No judgement! Need help with reorganize pantry. Bc now I’m in over my head.”
Every reply on that thread pointed to the same answer: small, frequent resets are cheaper than rare, massive ones.
The routine:
- Return any stray items to their correct zone (30 seconds)
- Wipe down the most-used shelf with a damp cloth (1 minute)
- Check for expiring items, pull anything within 30 days of expiration to a “use first” bin (2 minutes)
- Scan for empty bins and shelf risers that need restocking (90 seconds)
Five minutes a week prevents the two-hour reorganization three months later. The math is clear, but the discipline is real. Set a recurring alarm on Sunday afternoon if you need a nudge.
For families with kids, add a lower snack zone shelf where children can grab their own items. Label it with pictures for pre-readers. It keeps the rest of the system intact while giving kids independence, and it means you are not the only person responsible for upkeep.
Digital Tools and Seasonal Resets
The longest-lasting pantry systems use a phone app to track inventory and a quarterly two-hour reset to catch what weekly maintenance misses. Most guides stop after you buy the bins and assume the system runs itself. It does not. The real maintenance happens in two places articles tend to skip: your phone and your calendar.
Best pantry inventory apps (Pantry Check, AnyList, and more)
A digital inventory solves the two biggest long-term problems: expiration blindness and duplicate buying. Apps like Pantry Check and AnyList let you scan barcodes, log expiration dates, and generate shopping lists from what you actually have on the shelf.
According to a 2023 survey by the International Food Information Council, households that use digital tracking tools report roughly 30% less food waste compared to those relying on memory alone. That is the single largest measurable improvement in this entire guide.
The FIFO rule also integrates cleanly with these apps. You log a can of beans with a 2026 date. The app reminds you when the 2025 stock is about to expire. In practice, this eliminates the “three identical jars of cumin” problem that haunts every long-term pantry.
For bulk buyers and meal preppers, Pantry Check offers category sorting (dry goods, spices, canned items) that mirrors your physical zone system. The app costs roughly $4 monthly, but the savings from not rebuying what you already own covers that in one grocery trip.
Seasonal pantry reset checklist
A deep clean once per quarter prevents the slow slide back into chaos. The seasonal reset is a two-hour routine that targets what weekly maintenance misses. Start by pulling everything off the shelves, yes, everything. Check every expiration date. According to the USDA (2024), canned goods maintain peak quality for 2 to 5 years, but many households toss items prematurely because they cannot read faded labels.
Donate any unopened, non-perishable items still within date that your household will not eat before the next season. Local food pantries, school food drives, and faith-based shelters take these year-round.
Here is the quarterly checklist most competitors skip:
| Task | Frequency | Why It Matters |
|---|---|---|
| Wipe all shelves with warm soapy water | Every 3 months | Removes crumbs that attract pantry moths and ants |
| Rotate stock for upcoming holidays | Quarterly (pre-season) | Move pumpkin spice forward in fall; clear space for summer BBQ staples |
| Check and replace shelf liners | Every 6 months | Prevents sticky residue and protects surfaces from spills |
| Audit food storage containers for cracks | Every 3 months | Cracked lids break the airtight seal, shortening shelf life |
| Reassess kid-friendly zones | Every season | Children grow; their snack needs and reach change |
Treat the seasonal reset as a calibration, not a full reorganization. You are not relabeling every bin. You are checking what slipped out of place, what expired, and what your family stopped eating since the last reset.
Frequently Asked Questions
How do you organize a small pantry?
Maximize vertical space with shelf risers and bins. Install tension rods to create vertical dividers for baking sheets or cutting boards. Use the door with over-the-door racks or adhesive hooks for lightweight items like spices and foil. Every inch counts when floor space is limited.
What is the best way to organize a pantry on a budget?
Repurpose what you already own. Shoeboxes become can organizers, mason jars hold dry goods, and empty egg cartons store small spice packets. Dollar-store baskets and lazy Susans cost under $5 each. The most effective budget-friendly organization starts with decluttering, because you cannot organize what you do not need.
How often should you clean out your pantry?
Twice per year minimum, once in spring and once before the holiday cooking season. Households that practice FIFO and keep a digital inventory with apps like Pantry Check or AnyList can stretch to quarterly deep cleans. The real trick is a 5-minute weekly reset: return stray items to their zones and wipe down the most-used shelf.
How do you keep a pantry organized long-term?
Three habits make the difference. First, label every bin and shelf zone clearly, because chalk labels allow easy updates when snack preferences shift. Second, enforce FIFO by placing newer items behind older ones, which the USDA recommends to reduce food waste and avoid expired goods. Third, do a seasonal reset every three months to donate unopened non-perishables and rotate stock for upcoming holidays or diet changes.
What should I store in a pantry?
Non-perishable food staples (canned goods, pasta, rice, oils), dry baking supplies, snacks, and overflow kitchen items like extra paper towels or small appliances. Avoid storing cleaning chemicals near food, because cross-contamination risks are real and fumes can affect dry goods over time. Keep a dedicated cleaning caddy on a lower shelf or in a separate cabinet.
Conclusion
A well-organized pantry is the product of five deliberate actions: emptying everything, zoning by how you actually cook, choosing storage that fits your budget, labeling so the system survives the week, and maintaining it with a FIFO-first mindset. Skip any one of them and the rest unravels.
The difference between a pantry that stays organized and one that reverts to chaos within two weeks is a system that matches your actual habits, not a Pinterest-perfect photo. Skip the $50 acrylic bins if you are on a budget. Shoeboxes, tension rods, and dollar-store lazy Susans do the same job for a fraction of the cost.
Your next move: Pick the one shelf in your pantry that bothers you most and empty it today. Sort, toss, wipe, and rebuild that single shelf using the zone system above. A fifteen-minute investment now is the proof you need that the whole pantry is fixable in a single weekend.
RankMath SEO Meta (Copy & Paste)
SEO Title: How to Organize a Pantry: Step-by-Step Guide for 2026
Meta Description: How to organize a pantry the right way: declutter, zone by routine, apply FIFO, and pick storage that fits your budget. Includes a free 5-minute weekly reset.
Focus Keyword: how to organize a pantry
URL Slug: how-to-organize-a-pantry