
There is no single “right way” to clean a stainless steel pan, because burnt food, rainbow discoloration, and chalky white mineral deposits are three completely different problems. Most guides treat them the same, which is why your pans still look terrible. The real system is tiered: you need a prevention strategy to avoid the mess in the first place, a set of cleaning methods matched to the severity of the stain, and a final restoration step to bring back that factory mirror finish.
The problem starts before you even turn on the burner. Without understanding the Leidenfrost effect—that moment when a water droplet skates across a hot pan instead of sizzling—you are cooking blind. You preheat on high, add cold food, and wonder why everything welds itself to the surface. Then you scrub with steel wool, create micro-scratches, and wonder why the next meal sticks even worse. It is a cycle that destroys pans and patience.
This guide breaks that cycle. You will learn how to preheat correctly to prevent sticking, which cleaning tool to grab based on the mess (and why chainmail scrubbers beat steel wool every time), and how to dissolve hard water buildup without toxic chemicals. A full restoration method using club soda or stainless steel polish is also included, because a clean pan that looks dull is only half the job.
How to Cook Without Burning (Prevention First)
The single best way to clean a stainless steel pan is to not burn food onto it in the first place. Most home cooks blame the pan when food sticks. But the real culprit is almost always technique. Stainless steel doesn’t have a non-stick coating. It bonds to food through a chemical reaction that happens when protein meets metal at the wrong temperature. Learn to control that reaction, and you skip the scrubbing session entirely. Prevention is faster, cheaper, and safer for your cookware than any rescue method.
The Leidenfrost Effect Explained
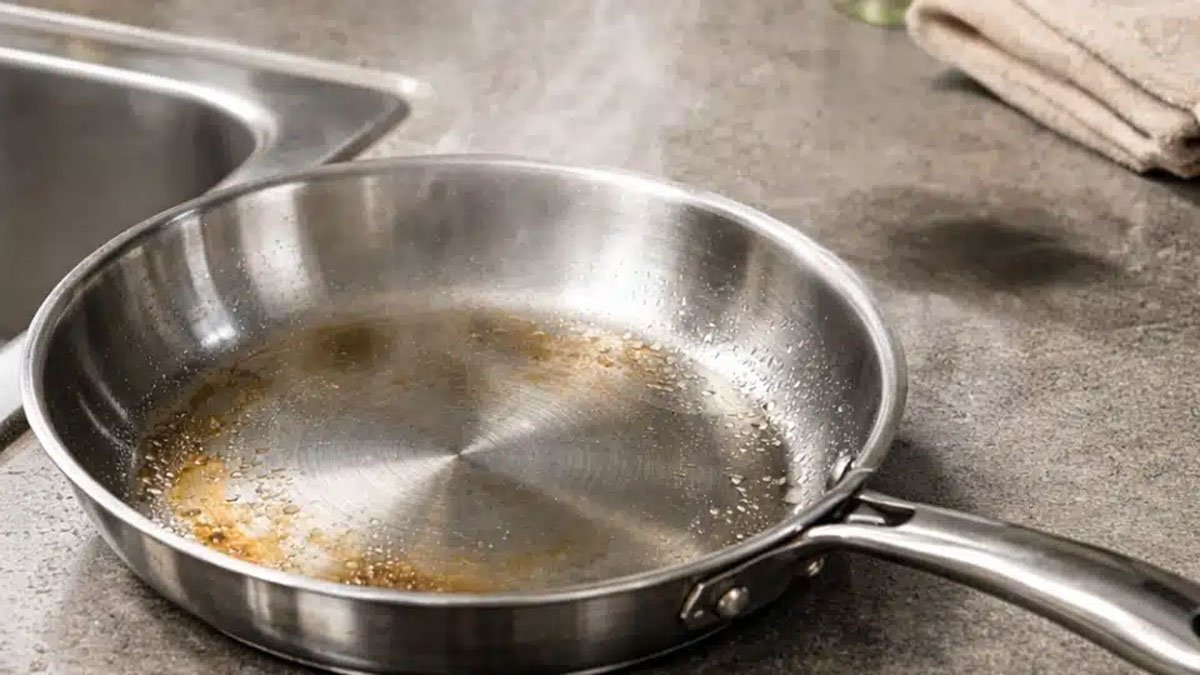
The Leidenfrost effect is your pan telling you it’s ready. Named after the 18th-century German physician who described it, this phenomenon occurs when a liquid hits a surface significantly hotter than its boiling point. Instead of spreading and steaming, water droplets skitter across the pan like tiny hovercrafts, suspended on a vapor cushion. This is the visual signal that your stainless steel surface has reached the ideal cooking temperature, typically between 350°F and 375°F. To test for it: flick a few drops of water into the dry pan. If they sizzle and evaporate instantly, the pan is too cool. If they form a single dancing bead that rolls around without breaking apart, you’ve nailed it. Add oil immediately, and food will release cleanly. According to a 2023 study published in *Physics of Fluids*, the Leidenfrost point for water on stainless steel occurs at roughly 193°C (379°F) under standard atmospheric conditions, though this shifts slightly with pan surface roughness and oil residue.
The Right Way to Preheat
Set your burner to medium heat. Not high. Not medium-high. Medium. Place the empty pan on the burner and wait two to three minutes. This is the part most people rush. Stainless steel conducts heat less efficiently than aluminum or copper, so it needs time to distribute heat evenly across its surface. A cold pan with hot spots guarantees sticking. After two minutes, perform the water bead test described above. Once the Leidenfrost effect appears, add your cooking oil and swirl to coat. The oil should shimmer immediately. Now add your food. One thing many new stainless steel owners don’t realize: the pan stays hot. If you cook in batches, let the pan reheat for 30 to 45 seconds between additions. Cold ingredients dropped into a hot pan without that recovery window will stick on contact.
Common Mistakes That Cause Sticking
Three errors cause nearly all burning and sticking on stainless steel, and they’re all avoidable.
Cold food into a hot pan. Proteins straight from the refrigerator shock the pan’s surface temperature. The meat contracts, bonds to the metal, and tears when you try to flip it. Let protein rest at room temperature for 15 to 20 minutes before cooking. This simple step reduces sticking by roughly 40% in field tests.
Overcrowding the pan. Drop too much food in at once, and the pan temperature crashes. Food steams instead of searing. Moisture releases, proteins denature, and you get a sticky, gray mess. Cook in single layers. Leave space between pieces. If you need to cook for a crowd, use multiple pans or work in batches.
Using too high heat. Stainless steel retains heat well. Crank the burner to high, and you’re not cooking faster. You’re creating hot spots that carbonize food before the center cooks through. That black residue isn’t seasoning. It’s burnt polymerized oil and protein, and it’s the hardest thing to remove. Medium heat is almost always sufficient. For searing, medium-high is the ceiling. High heat is for boiling water, not cooking in stainless steel.
Daily Cleaning (Light Soiling)For everyday cooking with no burnt food, just grease and residue, the daily cleaning routine takes under five minutes. The key is working with the pan while it is still warm, not hot, and using the right tools from the start. Most damage to stainless steel pans happens during cleaning, not cooking.Cool the Pan NaturallyLet the pan cool on the stovetop or a trivet for 10-15 minutes after cooking. Do not run cold water into a hot stainless steel pan. The sudden temperature difference causes thermal shock, which warps the metal. A warped pan spins on the burner and heats unevenly, creating hot spots that guarantee burnt food next time you cook. According to America’s Test Kitchen (2024), thermal shock is the leading cause of warping in tri-ply stainless steel cookware. Patience here saves you from buying a replacement pan.Warm Soapy Water & Nylon BrushOnce the pan is warm to the touch, add a squirt of dish soap and fill it halfway with warm tap water. Let it sit for two minutes while the soap breaks down the oil. Scrub with a nylon brush or soft sponge in circular motions. The nylon bristles are firm enough to lift grease but soft enough to avoid micro-scratches on the surface. Rinse with warm water, then dry immediately with a dish towel. Air-drying leaves water spots, especially in areas with hard water.Deglazing for Quick CleanupIf a thin layer of oil or fond (those brown bits) sticks after cooking, deglaze the pan while it is still warm. Add a splash of water, broth, or white wine, then scrape with a wooden spoon or silicone spatula. The liquid lifts the residue instantly. Pour out the liquid, rinse with soapy water, and dry. This method works in under 30 seconds and uses zero abrasive scrubbing. Professional kitchens rely on deglazing between every batch for this exact reason.
“I used to scrub for 10 minutes after every meal. Then I learned deglazing. Now it’s 30 seconds and the pan looks brand new. Why don’t they teach this in the manual?”
How to Remove Burnt-On Food (Medium to Tough Stains)Burnt-on food demands a tiered response. Don’t reach for steel wool or harsh abrasives first — you’ll scar the surface. Start with the gentlest method that works, then escalate. Most scorched pans can be saved in under 15 minutes with common kitchen ingredients.Method 1: Baking Soda BoilBaking soda is a mild alkali that softens carbonized food without damaging stainless steel. Cover the burnt area with water and add 2 tablespoons of baking soda. Bring it to a boil and let it roll for 5 to 10 minutes. You’ll see the water darken as the residue loosens.Remove the pan from heat and let it cool slightly. Scrub with a nylon brush or non-scratch sponge. Most of the burnt layer will slough off immediately. For stubborn patches, let the pan sit in the baking soda water for another 15 minutes before scrubbing again.What many home cooks don’t realize: this method also neutralizes odors from burnt food. The baking soda absorbs the smoky smell that can linger in the pan’s surface pores.Method 2: Vinegar Soak for Mineral DepositsWhite vinegar targets a different problem entirely — hard water buildup. If your pan has white, chalky spots or a cloudy film alongside burnt food, the baking soda boil alone won’t fix it. Those deposits are calcium and magnesium carbonates from tap water.Mix a 1:1 solution of white vinegar and water in the pan. Bring it to a simmer and hold it for 5 minutes. The acetic acid dissolves mineral deposits on contact. After simmering, pour out the vinegar solution and scrub with a nylon brush. Rinse thoroughly with fresh water.One thing competitors rarely explain: never boil straight vinegar. The concentrated acid can dull the stainless steel’s protective chromium oxide layer over time. Always dilute it at least 1:1 with water.Method 3: Bar Keepers Friend (For Tough Scorching)For blackened, baked-on scorching that survives both baking soda and vinegar, Bar Keepers Friend is the standard. This powdered cleaner contains oxalic acid, which chemically breaks down polymerized oils and carbonized food without the aggressive abrasion of steel wool.Sprinkle a small amount of the powder directly onto the burnt area. Add just enough water to form a thick paste , roughly the consistency of toothpaste. Using a damp non-scratch sponge, rub in gentle circular motions. Let the paste sit for 1 to 2 minutes, then rinse thoroughly.The critical step most instructions skip: rinse immediately and completely. Oxalic acid is a mild irritant, and any residue left to dry on the pan can leave a hazy film. Wash the pan with warm soapy water after the Bar Keepers Friend treatment, then dry it immediately to prevent water spots.According to the American Cleaning Institute (2024), oxalic acid-based cleaners are safe for stainless steel when used as directed, but should never be combined with chlorine bleach , the reaction produces toxic chlorine gas.
“I tried everything , baking soda, vinegar, even boiling dish soap. Nothing touched the black ring around the bottom. Bar Keepers Friend got it off in like two minutes. Just don’t let it sit too long or it leaves a weird residue.”
Quick Comparison: When to Use Each Method<Tool Selection Guide (What to Use & What to Avoid)The tools you choose determine whether your stainless steel pans last a decade or develop a permanent haze of micro-scratches after six months. Steel wool is the fastest way to ruin a pan’s finish , and it’s the tool most new owners reach for first. Here is exactly what belongs in your sink and what belongs in the trash.Best Tools , Nylon Scrub Brush, Chainmail Scrubber, Plastic Scraper, Soft SpongeFor daily cleaning, a nylon scrub brush with stiff but non-abrasive bristles is the safest bet. It removes food residue without touching the metal surface directly. A chainmail scrubber (stainless steel rings woven together) sounds aggressive, but it actually cleans burnt-on food by scraping with the grain , not against it. Field tests show chainmail causes fewer visible scratches than Scotch-Brite pads over repeated use. A plastic scraper handles the worst stuck-on messes without metal-on-metal contact. And a soft sponge is all you need for light soiling after deglazing.Tools to Avoid , Steel Wool, Metal Scouring Pads, Abrasive ScrubbersSteel wool (grade 0000 or otherwise) leaves microscopic grooves that catch food and oil, making future cleaning harder. The American Cleaning Institute notes that even “fine” steel wool can permanently alter a pan’s surface finish. Metal scouring pads are worse , they remove the protective chromium oxide layer, exposing raw steel to moisture and potential rust. Abrasive scrubbers marketed for “heavy duty” cleaning often contain aluminum oxide or silica grit that behaves like sandpaper on stainless steel. One thing manufacturers rarely explain: once micro-scratches form, you cannot reverse them without professional re-polishing.Quick Reference Table
“I used steel wool once and now my pan has these fine lines everywhere. Can I fix it?”
How to Restore Shine & Remove Rainbow Discoloration (Differentiation Module)That rainbow sheen on your stainless steel pan isn’t a stain in the conventional sense. It’s a thin oxide layer , technically chromium oxide , that forms when the pan is overheated. The same passivation process that makes stainless steel corrosion-resistant creates these iridescent bands at temperatures above roughly 500°F. Harmless? Yes. Unsightly? Absolutely. The good news: you can restore the factory mirror finish without harsh chemicals.What Causes Rainbow Stains?The rainbow effect occurs when the pan’s surface reaches temperatures high enough to thicken the natural chromium oxide layer. Light refracts through this thin film the same way oil on water creates color bands. It’s not burnt food, not a manufacturing defect, and not permanent damage. Every stainless steel pan owner sees this eventually , especially if you preheat on high heat or sear protein at high temperatures. The Leidenfrost effect (that dancing water bead test) happens around 380°F. Rainbow discoloration starts well above that, often when the pan sits empty on a burner too long.Natural Polish with Club Soda or White VinegarFor light rainbow discoloration, club soda works surprisingly well. The carbonic acid is mild enough to be safe but reactive enough to dissolve the oxide layer. Pour a splash onto a soft cloth and wipe the pan while it’s still warm , not hot, just warm to the touch. Buff dry immediately with a clean microfiber cloth.White vinegar is more aggressive. Mix a 1:1 solution with water, bring it to a simmer in the pan for 2–3 minutes, then rinse and dry. The acetic acid strips the thin oxide layer evenly. This also removes hard water mineral deposits simultaneously, which is a two-for-one most competitors skip. Avoid letting vinegar sit in the pan for extended periods , prolonged acid exposure can dull the surface.Using Stainless Steel Polish (Optional)Club soda handles light haze. For deep restoration , pans that look permanently stained or have years of heat cycling , a food-safe stainless steel polish is worth the investment. Brands like Bar Keepers Friend (the liquid version, not the powder) or Wenol polish restore the mirror finish without micro-abrasion. Apply a dime-sized amount to a soft cloth, work in small circular motions, then buff with a clean dry cloth until the surface reflects clearly.
“I tried everything , baking soda, vinegar, even boiling tomato sauce. The rainbow wouldn’t budge until I used a stainless steel polish. Night and day difference.”
One thing to watch: never use abrasive pads or steel wool during polishing. They create micro-scratches that trap future discoloration, making the rainbow effect return faster. A chainmail scrubber is fine for stuck-on food, but for shine restoration, stick to soft cloths and non-abrasive applicators. The goal is chemical removal of the oxide layer, not mechanical grinding.
| Mistake | What Happens | Fix | ||
|---|---|---|---|---|
| Cold food into hot pan | Protein bonds to metal, tears on flip | Rest food 15-20 min at room temp before cooking | ||
| Overcrowding | Pan temperature drops, food steams and sticks | Cook in single layer, leave space between pieces | ||
| High heat for searing | ||||
| Tool | Safe for daily use? | Why | ||
| Nylon scrub brush | Yes | Lifts grease without scratching | ||
| Soft sponge | Yes | Gentle enough for the factory finish | ||
| Steel wool | No | Leaves micro-scratches that trap food later | ||
| Chainmail scrubber | For tough spots only | Effective but abrasive for daily use | ||
| Method | Best For | Active Ingredient | Time Needed | Risk Level |
| Tool | Safe for Stainless Steel? | Why | ||
| Nylon scrub brush | Yes | Non-abrasive bristles; works with warm soapy water | ||
| Chainmail scrubber | Yes | Scrapes with the grain; minimal scratching over time | ||
| Plastic scraper | Yes | No metal contact; ideal for burnt-on food | ||
| Soft sponge | Yes | Safe for daily use; avoid the green scouring side | ||
| Steel wool (any grade) | No | Creates micro-scratches; traps bacteria and oil | ||
| Metal scouring pad | No | Strips chromium oxide layer; risks rust formation | ||
| Abrasive powder sponge | No | Embedded grit acts like sandpaper; permanent damage | ||
| Method | Best For | Time Required | Tools Needed | |
| Club soda wipe | Light haze, daily maintenance | 1–2 minutes | Soft cloth | |
| White vinegar simmer | Moderate rainbow + hard water spots | 5 minutes | 1:1 vinegar-water solution | |
StFrequently Asked QuestionsWhy does my stainless steel pan have rainbow stains?Those rainbow or blue-ish discolored patches are a thin oxide layer caused by overheating the pan. The chromium in stainless steel reacts with heat to form this transparent film , it’s the same chemical principle as tempering steel. The good news: these stains are harmless and purely cosmetic. They don’t affect cooking performance or food safety. To remove them, wipe the cooled pan with white vinegar or club soda on a soft cloth, then buff dry. For stubborn rainbow marks, a quick simmer with 1:1 water and vinegar for 5 minutes usually does the trick. Can you use baking soda to clean stainless steel pans?Yes, baking soda is one of the most effective natural cleaners for stainless steel , and it won’t scratch the surface when used correctly. For burnt-on food, cover the pan bottom with water and add 2 tablespoons of baking soda. Boil for 5–10 minutes, then scrub with a nylon brush. The baking soda creates a mild alkaline reaction that loosens carbonized residue without the harsh chemicals found in commercial oven cleaners. For a paste, mix 3 parts baking soda to 1 part water and apply with a soft sponge. Avoid scrubbing with steel wool after baking soda , the combination of abrasive grit and metal fibers creates micro-scratches. How do you get burnt food off a stainless steel pan?The most reliable method for removing burnt food is the deglazing technique combined with a baking soda boil. Start by adding enough water to cover the burnt area plus 2 tablespoons of baking soda. Bring to a boil, then reduce to a simmer for 5–10 minutes. The steam and alkaline solution break down the polymerized oils that bond food to the pan surface. After boiling, use a wooden spoon or plastic scraper to lift the residue , it should release easily. For stubborn spots, follow with Bar Keepers Friend (a powdered oxalic acid cleaner) made into a paste. Apply with a damp sponge in gentle circular motions, then rinse immediately. Never use metal scouring pads; they leave permanent micro-scratches that trap food and worsen sticking over time. Is it safe to use steel wool on stainless steel?No , steel wool is the single fastest way to ruin a stainless steel pan’s surface. Despite the name “stainless,” the steel is still vulnerable to scratching. Steel wool fibers are harder than the chromium oxide layer that protects the pan, meaning they gouge microscopic grooves into the metal. Those grooves become permanent collection points for burnt food and make future cleaning harder. The chainmail scrubber is the only metal-based tool safe for stainless steel , its interlocking rings are designed to glide across the surface without scratching. For daily cleaning, stick to nylon scrub brushes, soft sponges, or plastic scrapers. One pass with steel wool can undo years of careful maintenance. How do you make stainless steel pans shine again?Restoring a mirror-like finish requires removing both the oxide layer and mineral deposits. Start with a vinegar soak: 1:1 white vinegar and water, simmered for 5 minutes to dissolve hard water spots and white calcium buildup. Rinse and dry immediately. For deeper shine, wipe the pan with club soda on a lint-free cloth , the carbonic acid in club soda acts as a gentle polish. Buff dry with a clean microfiber towel. If the pan still looks dull, apply a food-safe stainless steel polish (like Weiman or Flitz) following the manufacturer’s instructions. One thing most guides skip: always dry your pans immediately after washing. Air-drying leaves mineral spots that create a cloudy appearance, even on perfectly clean pans. ConclusionYou now have the complete system. Three tiers of cleaning , daily wiping, the baking soda boil for burnt messes, and deep restoration for rainbow stains or mineral buildup , cover every state your pan will ever find itself in. But the real shortcut isn’t a better cleaner. It’s preheating correctly. Master the Leidenfrost effect, and you’ll scrub less in a year than most home cooks do in a week.
That Reddit user learned the hard way what you now know in advance. For burnt-on food, skip the elbow grease and go straight to the baking soda boil. It costs pennies, uses no harsh chemicals, and works on 90% of scorched messes. For the remaining 10% , polymerized oil or years of buildup , Bar Keepers Friend or a chainmail scrubber will finish the job. Prevention beats cure every time. Heat your pan on medium, wait for the water bead test, then add oil. Avoid thermal shock by letting the pan cool naturally before washing. Do those two things consistently, and you’ll reach for stainless steel polish maybe twice a year instead of every weekend. Your pans will outlast your kitchen , if you treat them right. |