
Mary Berry Cheese Scones Recipe
As a baker focused on fitness, I have improved the classic Mary Berry Cheese Scones Recipe, making them healthier while retaining their smooth texture.
Mary Berry is a popular British baker known for her great recipes. Her cheese scones are easy to make and taste like they came from a bakery. This recipe is from Mary Berry’s Baking Bible.
These scones are soft, golden, and have a delicious cheese flavor. Keeping outside is light and crisp, while the inside is soft and fluffy. They blend butter, cheese, and warmth, making your kitchen smell wonderful.
I’ve tested over 10 batches! By the time you finish reading this, you will know how to bake perfect Mary Berry cheese scones every time, golden on top, soft inside, and full of cheesy flavor.
Why This Cheese Scone Recipe is a British Favorite
Mary Berry is a well-known British baker, often called the “Queen of Baking.”
Her cheese scones show exactly why she’s earned that title. They’ve been shared on TV shows and in cookbooks like “Mary Berry’s Baking Bible”, showing how she keeps classic British baking alive in home kitchens.
These cheese scones are known for their soft, crumbly texture and deep cheddar flavor. They rise beautifully, giving a light bite without being dry.
When warm, the cheese melts just enough to create a creamy taste that pairs perfectly with a bit of butter.

How Mary Berry’s Scones Differ from Other Recipes
Many cheese scone recipes use plain cheddar and a bit of milk. Mary Berry’s recipe adds a touch of mustard powder and baking powder for extra rise and flavor, making her scones light rather than dense.
Compared to a standard cheddar scone, Mary’s version has a slightly sharper taste and a softer crumb.
Some versions found online might skip the mustard or use less cheese, but that small difference changes the flavor completely.
Mary’s recipe brings out the full cheese taste while keeping the scones soft and airy – never heavy or dry.
Ingredients for Mary Berry Cheese Scones
Below are the ingredients used for this recipe. Simple swaps can be made if needed.
Self-Raising Flour (250 g): This flour already has a little baking powder mixed in, which helps the scones rise and stay fluffy. If self-raising flour is not available, mix 2 cups of all-purpose flour with 2 teaspoons of baking powder and a pinch of salt. This will work just as well.
Butter (60 g): Butter gives the scones a rich flavor and helps them stay soft. Cold butter is best for this recipe because it mixes into the flour and makes small layers that turn flaky when baked. If butter is not on hand, margarine can be used, but the taste will be a little less creamy.
Cheddar Cheese (120 g, grated): Cheddar adds that strong, cheesy taste everyone loves. Use sharp cheddar for bold flavor or mild cheddar for a softer taste. Monterey Jack or Colby cheese can also work if cheddar is not available.
Baking Powder (1 teaspoon): This helps the scones puff up while baking. It gives them a light texture. Be careful not to add too much, as that can make the scones taste bitter.
Mustard Powder (1 teaspoon): A small amount of mustard powder brings out the cheese flavor even more. It doesn’t make the scones spicy; it just adds depth. If mustard powder isn’t available, a teaspoon of Dijon mustard mixed into the milk can be used instead.
Egg (1 large): The egg helps bind everything together and adds a bit of color to the dough. It also gives the top a shiny golden finish when brushed before baking.
Milk (150 ml): Milk brings the dough together and keeps it soft. Any kind of milk works, from whole to low-fat. For dairy-free options, try unsweetened soy milk or oat milk.
Paprika (optional): Paprika adds a hint of color and a gentle flavor on top. It’s not required but gives the scones a nice look. Smoked paprika can add a tiny touch of warmth too.
Essential Tools and Equipment for Baking
- Oven – For baking the scones
- Food Processor or Mixing Bowl – To blend the ingredients
- Measuring Jug – To measure and mix milk
- Rolling Pin – To flatten the dough evenly
- Scone Cutter or Round Cutter – For shaping the scones
- Baking Tray – To place scones for baking
- Parchment Paper – To stop scones from sticking
- Pastry Brush – For brushing milk on top
- Grater – To grate the cheese finely
- Cooling Rack – To let scones cool down
How to Make Mary Berry Cheese Scones at Home
Step 1 | Preheat the Oven
Start by heating the oven to 200°C (about 400°F). This ensures it’s ready once the dough is prepared. A hot oven is key to getting those scones to rise properly and develop a golden crust.
Step 2 | Mix the Dry Ingredients
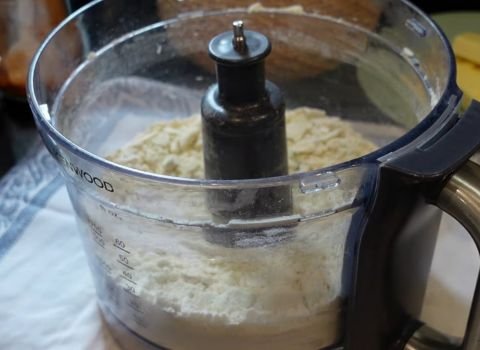
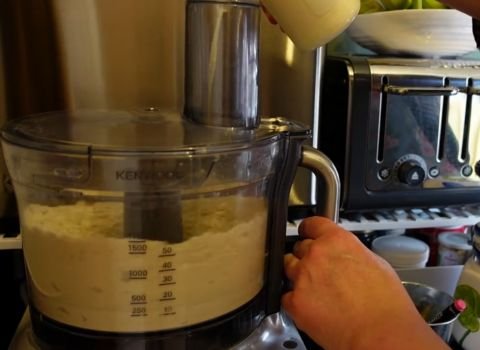
Add self-raising flour, baking powder, and mustard powder to a food processor or large bowl. Mix them gently so everything is combined. This step makes sure the mustard powder and baking powder are spread evenly throughout the flour.
Step 3 | Add Butter
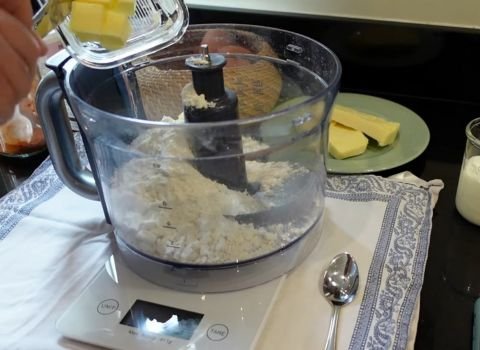
Cut the cold butter into small cubes. Add them to the flour and blend in short bursts until the mix looks like breadcrumbs. This can also be done by hand by rubbing the butter into the flour with fingertips. The cold butter creates tiny pockets that turn into flaky layers when baked.
Step 4 | Add the Cheese
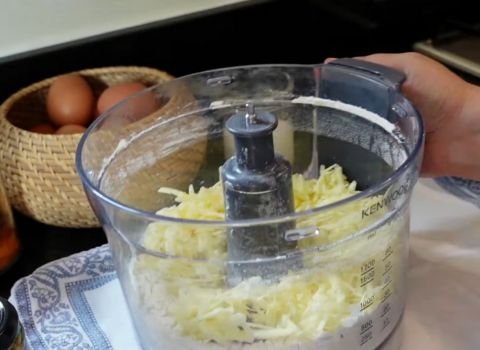
Stir in most of the grated cheddar cheese, saving a small handful for the topping later. Mix it just until the cheese is spread evenly through the flour. Don’t overmix at this stage, as you want the cheese to stay in small pieces throughout the dough.
Step 5 | Prepare the Milk Mixture
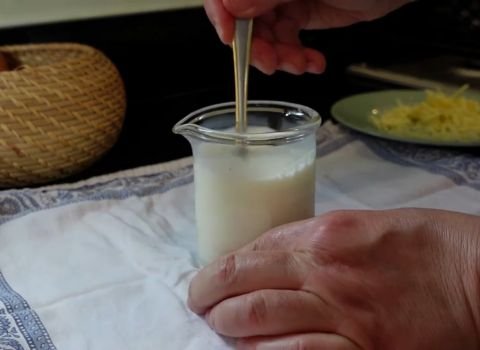
Crack the egg into a measuring jug. Pour milk into the jug until the liquid reaches 160 ml in total. Whisk lightly with a fork until smooth. Keep one spoonful of this milk mixture aside for brushing the tops later. This egg wash gives the scones that shiny, golden finish.
Step 6 | Form the Dough
Pour the rest of the milk mixture slowly into the flour and cheese bowl. Mix gently with a spoon or hands until it forms a soft, slightly sticky dough. Be careful not to overmix, as that can make the scones heavy. The dough should just come together without being too wet or too dry.
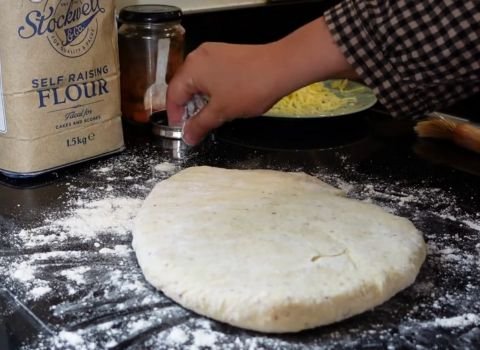
Step 7 | Roll Out the Dough
Lightly flour a clean surface. Place the dough on it and roll it out gently to about ¾ inch (2 cm) thick. Keep the rolling even so all scones bake the same. A thicker dough means fluffier scones, so don’t roll it too thin.
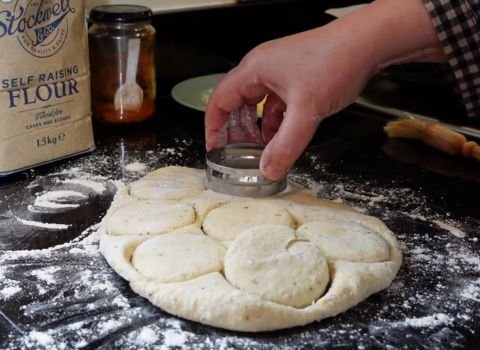
Step 8 | Cut the Scones
Use a round cutter to press out each scone. Dip the cutter in flour before each cut to stop sticking. Gather the leftover dough, roll again, and cut more scones until all dough is used. Try not to twist the cutter when pressing down, as this can seal the edges and stop the scones from rising properly.
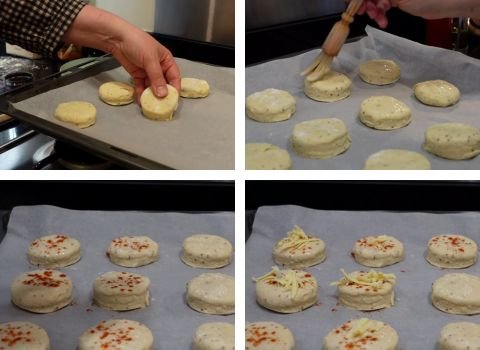
Step 9 | Prepare for Baking
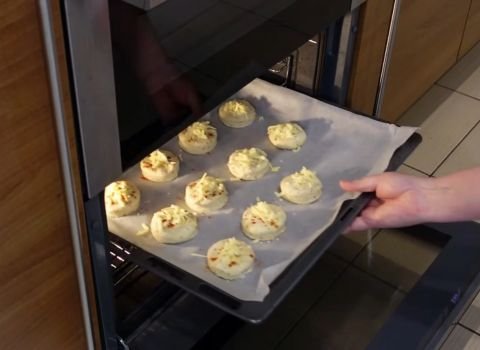
Place the scones on a parchment-lined baking tray. Brush the tops with the milk and egg mix you saved earlier. Sprinkle a little paprika and the remaining grated cheese over each one. This topping adds extra flavor and makes them look really appetizing.
Step 10 | Bake to Perfection
Put the tray in the preheated oven and bake for 10–15 minutes, or until the scones are puffed up and golden brown on top. Keep an eye on them after 10 minutes, as ovens can vary. You want them golden but not burnt.
Step 11 | Cool and Serve
Take them out and let them rest on a cooling rack for a few minutes. Serve warm with a spread of butter or extra cheese for the best taste. These scones are at their absolute best when still slightly warm from the oven.

5 Tips for Achieving Fluffy and Flavorful Scones
1. Keep Everything Cold: Use cold butter and cold hands for better scones. Cold butter creates steam in the oven, helping the scones rise and become flaky. Work quickly so the dough doesn’t warm up too much.
2. Don’t Overwork the Dough: Mix the dough just until it comes together. Overworking the dough makes scones tough and dense, rather than light and fluffy. It’s fine if the dough looks a bit rough.
3. Use Sharp Cheese for More Flavor: Sharp or extra-sharp cheddar gives scones a stronger cheese taste. Mild cheddar is okay, too, but the flavor won’t be as bold. Grate cheese fresh for better melting.
4. Check Your Oven Temperature: Every oven bakes differently. Use an oven thermometer to check your temperature. If it’s too hot, the scones may brown too fast on top. If it’s too cool, they can come out dry.
5. Space Them Out on the Tray: Leave some space between each scone on the baking tray so hot air can circulate them, allowing them to bake evenly and get crispy on all sides.
Best Pairings for Mary Berry Cheese Scones
These scones are great on their own, but they taste even better with the right pairings.
Spread a bit of soft butter on top while they’re still warm. The butter melts right in and adds richness.
Cream cheese works well too, especially with a pinch of black pepper on top.
Serve the scones with a bowl of hot soup. Tomato soup, potato soup, or vegetable soup all go well. The scones soak up the soup and add a cheesy bite to each spoonful.
They also work as a side with salads. A simple green salad with a light dressing balances the richness of the scones.
Some people like to serve them with pickles or chutney. The tangy taste cuts through the cheese and adds contrast.
These scones also go well with scrambled eggs or a plate of roasted vegetables.
They’re not just for tea time. They can be part of breakfast, lunch, or dinner.
Make-Ahead, Storage, and Reheating Instructions
You can make the scone dough ahead of time. After cutting out the scones, place them on a baking tray and cover them with plastic wrap. You can refrigerate them for up to a day. When you’re ready, bake them straight from the fridge.
Once baked and fully cooled, store the scones in an airtight container. They will stay fresh at room temperature for about 2 days.
For longer storage, you can freeze them. Wrap each scone tightly and put them all in a freezer bag. They can be frozen for up to 3 months.
To reheat, place room-temperature scones in a warm oven for 5-10 minutes until heated through. You can also warm frozen scones directly in the oven without thawing them first. Just add a few extra minutes to the heating time.
Frequently Asked Questions About Cheese Scones
1. How can I stop my scones from spreading?
Keep the dough from getting too wet. It should be soft but hold its shape. Using cold butter before mixing and making sure the oven is fully preheated helps the scones rise rather than spread out.
2. Why did my scones turn out dense?
Dense scones often result from overmixing or overflattening the dough. Handle the dough gently and stop mixing as soon as it comes together. Cut the dough to about ¾ inch thick for the best results.
3. Why didn’t my scones rise properly?
Scones may not rise if your baking powder or self-raising flour is old, so check the expiration dates. Overmixing makes the dough dense, and a cold oven can prevent rising. Cut straight down with the cutter; twisting can stop them from puffing.
Using cold butter helps the scones lift during baking.
4. Why are my scones too dry or crumbly?
Dry scones usually happen when there isn’t enough liquid, or you bake them too long. Measure the milk and egg carefully, and mix until the dough comes together.
Don’t use too much flour when rolling the dough, and watch them in the oven. They are ready when they are golden and slightly firm. Use fresh ingredients and keep them in a sealed container to prevent drying out.
5. Why is my dough so sticky?
Sticky dough can happen if you add a bit too much liquid or use the wrong kind of flour. The weather can also affect it. If the dough is too sticky to handle, sprinkle a little flour on your hands and the surface to make it easier to work with without changing how the scones turn out.

Mary Berry Cheese Scones Recipe
Ingredients
Equipment
Method
- Preheat your oven to 200°C (400°F) and line a baking tray with parchment paper. A properly preheated oven helps scones rise beautifully.
- In a large mixing bowl, combine self-raising flour, baking powder, and mustard powder. Mix gently so the dry ingredients are evenly distributed.
- Add cold cubed butter to the flour mixture. Rub it in with your fingertips or pulse in a food processor until the mixture looks like fine breadcrumbs.
- Stir in most of the grated cheddar cheese, saving a small amount for sprinkling on top later.
- In a jug, beat 1 egg and add milk until the total liquid equals 160 ml. Reserve 1 tablespoon of this mixture for brushing the tops before baking.
- Gradually add the remaining egg-milk mixture into the flour mixture. Stir gently until a soft, slightly sticky dough forms. Do not overmix.
- Lightly flour your surface and roll the dough to about 2 cm (¾ inch) thick. Use a round cutter to cut out scones, dipping it in flour each time. Reform and cut the remaining dough.
- Place scones on the prepared tray. Brush the tops with the reserved egg-milk mixture, sprinkle with paprika and the remaining cheese.
- Bake for 10–15 minutes, until puffed and golden brown. Check at 10 minutes; ovens vary.
- Remove from oven and let scones cool for 5 minutes on a wire rack. Serve warm with butter or cream cheese for the best flavor.
This Mary Berry Cheese Scones Recipe is an easy way to bake soft, cheesy scones that taste really good.
The mix of cheese, a touch of mustard, and a light texture makes it special. You can try small changes to make the flavor just how you like it.
Bake these scones at home and see how simple and happy baking can be!